Save
Save My daughter walked into the kitchen one Saturday and announced she wanted something pink, sweet, and ready by dinner. I had white chocolate, a tin of condensed milk, and a bag of freeze-dried strawberries I'd forgotten about in the pantry. Twenty minutes of melting and stirring later, we had a pan of brilliant pink fudge chilling in the fridge. By evening, those soft, tangy squares had vanished, and I'd earned the title of dessert genius for at least a week.
I brought a batch to a potluck once, tucked into a vintage cookie tin. People kept asking if I'd ordered them from a bakery. One friend stood by the dessert table guarding the last two squares until I promised to text her the recipe. That night, I realized these little pink bites had become my secret weapon for any gathering where I wanted to look like I tried harder than I did.
Ingredients
- Digestive biscuits or graham crackers: Crush them fine so the crust holds together without crumbling when you slice, and always taste one first to make sure they are fresh and not stale.
- Unsalted butter: Melted butter coats every crumb evenly and creates a base that sets firm in the fridge without turning greasy.
- White chocolate chips: Use real white chocolate with cocoa butter, not candy melts, or the fudge will seize and turn grainy instead of silky.
- Sweetened condensed milk: This is the magic binder that turns melted chocolate into fudge, so do not swap it for regular milk or cream.
- Freeze-dried strawberries: Grind them to a fine powder in a spice grinder or blender, they pack pure berry flavor without the water content that would soften the fudge.
- Pure vanilla extract: Just a teaspoon rounds out the sweetness and makes the strawberry taste more like real fruit instead of candy.
- Pinch of salt: Salt sharpens the strawberry tang and keeps the white chocolate from tasting flat or cloying.
- Pink or red gel food coloring: Totally optional, but a drop or two makes the squares look as vibrant as they taste.
Tired of Takeout? 🥡
Get 10 meals you can make faster than delivery arrives. Seriously.
One email. No spam. Unsubscribe anytime.
Instructions
- Prep the pan:
- Line your square pan with parchment, letting the ends hang over the sides like handles. This trick turns out perfect squares every time without prying or scraping.
- Make the crust:
- Stir crushed biscuits and melted butter until every crumb is glossy and damp, then press the mixture flat and even across the bottom of the pan. Pop it in the fridge while you start the fudge so it firms up and does not mix into the topping.
- Melt the chocolate base:
- Set a heatproof bowl over simmering water and add white chocolate and condensed milk, stirring gently until smooth. Do not let the water touch the bowl or the chocolate may scorch and turn lumpy.
- Flavor the fudge:
- Remove from heat and stir in strawberry powder, vanilla, salt, and a drop of food coloring if you want that candy-shop pink. Mix until the color is even and the powder disappears completely.
- Assemble and chill:
- Pour the warm fudge over the chilled crust and spread it to the edges with a spatula. Cover loosely and refrigerate for at least two to three hours until the top feels firm when you press it lightly.
- Slice and serve:
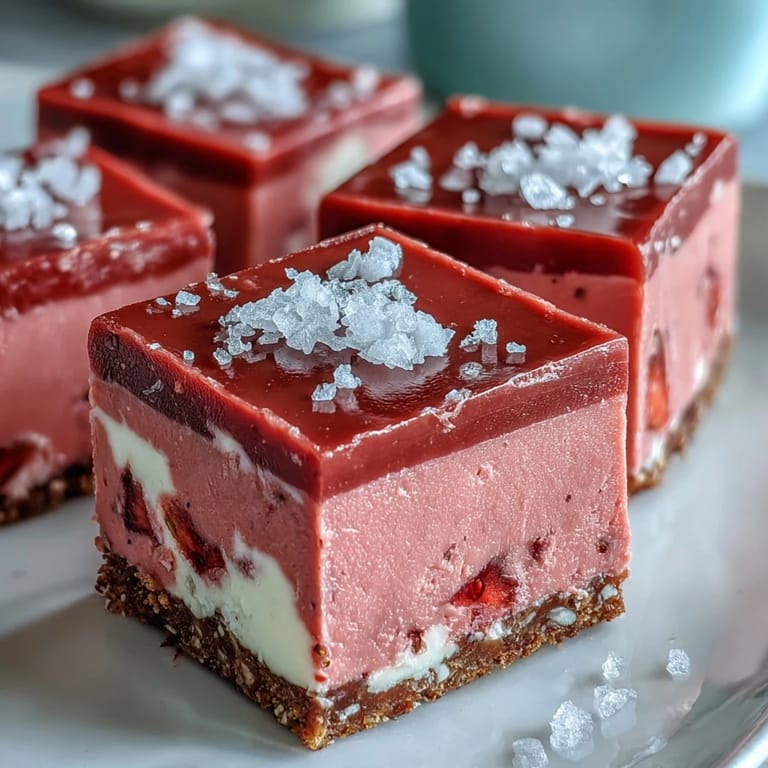
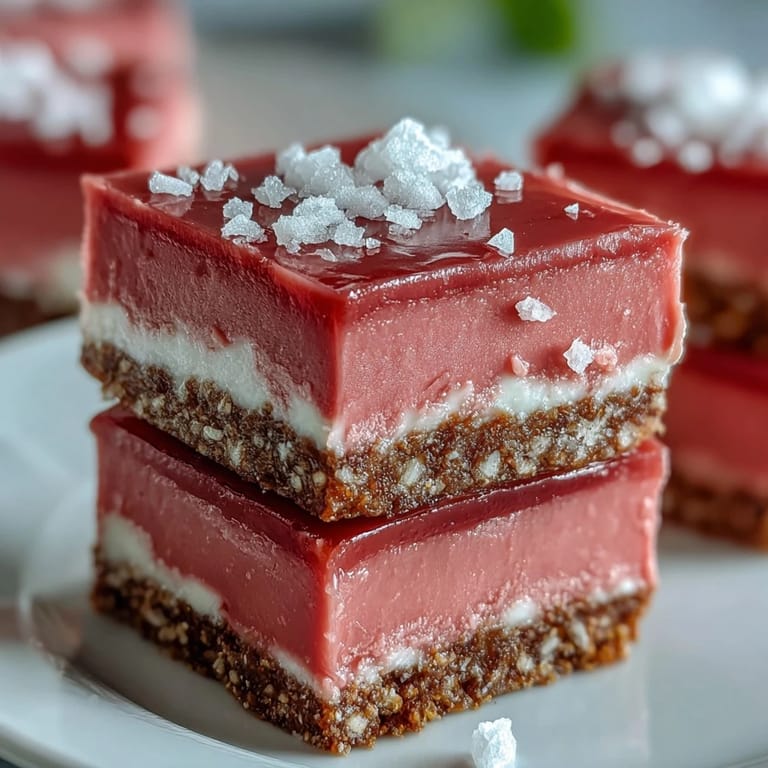
- Lift the whole slab out using the parchment, then cut into sixteen squares with a sharp knife, wiping the blade after each cut. Garnish with fresh strawberry slices or crushed freeze-dried pieces if you are feeling fancy.
 Save
Save One summer evening, I set a tray of these squares on the porch while friends sat around talking. The sun turned everything golden, and someone said the pink fudge looked like little bites of sunset. We laughed, but the name stuck, and now every time I make them, I think of that warm light and the way something this simple can turn an ordinary night into a memory.
Storing and Keeping
These squares live happily in an airtight container in the fridge for up to five days, stacked between sheets of parchment so they do not stick together. I pull them out ten minutes before serving so they soften just enough to bite without shattering. If you want to freeze them, wrap each square individually in plastic, then pile them into a freezer bag and they will keep for a month, thawing in minutes on the counter.
Swaps and Variations
For a dairy-free version, swap in coconut condensed milk and dairy-free white chocolate, though the texture will be slightly softer and the flavor will carry a hint of coconut. You can dial the strawberry intensity up or down by adjusting the amount of freeze-dried powder, or swirl in a spoonful of crushed raspberries for a marbled berry effect that looks bakery-worthy. I have also made these with lemon zest and blueberry powder when strawberries were out of season, and they tasted like summer in January.
Serving Suggestions
These squares are perfect tucked into a lunch box, stacked on a dessert platter, or wrapped in wax paper and tied with string for edible gifts. I love serving them with strong black coffee or cold milk, and they are just sweet enough to follow a heavy dinner without feeling like too much. Kids adore them straight from the fridge, while adults tend to prefer them slightly softened so the fudge melts on the tongue.
- Dust the tops with freeze-dried strawberry crumbs for extra color and crunch.
- Serve alongside fresh berries and whipped cream for an easy no-bake dessert board.
- Pack them in a tin for picnics, they travel beautifully and do not melt in warm weather.
 Save
Save Every time I pull these pink squares from the fridge, I am reminded that the best desserts are the ones you can make without turning on the oven or spending hours in the kitchen. They taste like effort, but they are really just a little melting, a little stirring, and a lot of patience while the fridge does the work.
Common Questions
- → Can I use fresh strawberries instead of freeze-dried?
Yes, you can substitute 100g of fresh strawberries. Purée them and strain through a fine mesh sieve to remove seeds before adding to the melted chocolate mixture.
- → How long do these fudge squares last in the refrigerator?
When stored in an airtight container, these squares will stay fresh for up to 5 days in the refrigerator.
- → Can I make these dairy-free?
Absolutely. Substitute dairy-free white chocolate and coconut condensed milk for the traditional dairy ingredients.
- → Do I need to add food coloring?
The freeze-dried strawberry powder naturally provides a soft pink hue. Add 1-2 drops of pink or red gel food coloring only if you want a more vibrant color.
- → Why is my fudge mixture too thick to pour?
If the mixture thickens too much, gently reheat it over the double boiler for 30-60 seconds, stirring constantly until it becomes pourable again.
- → Can I freeze these squares?
Yes, you can freeze them for up to 2 months. Thaw in the refrigerator overnight before serving.