 Save
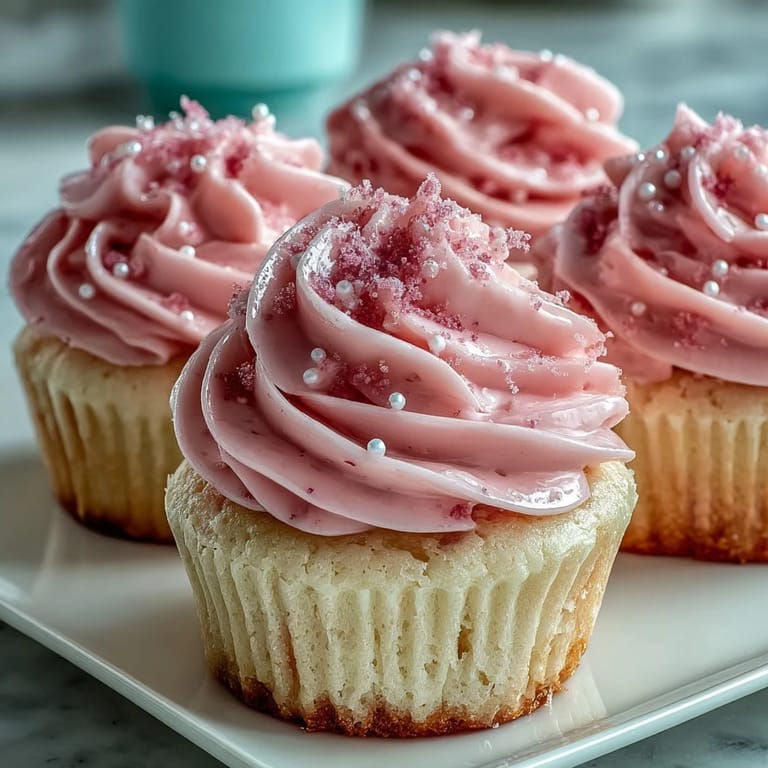
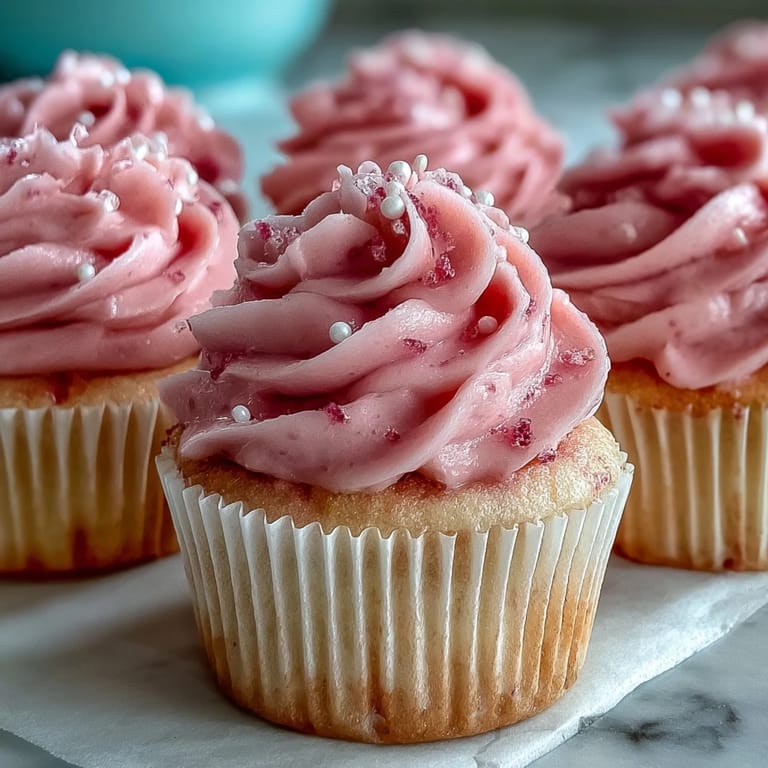
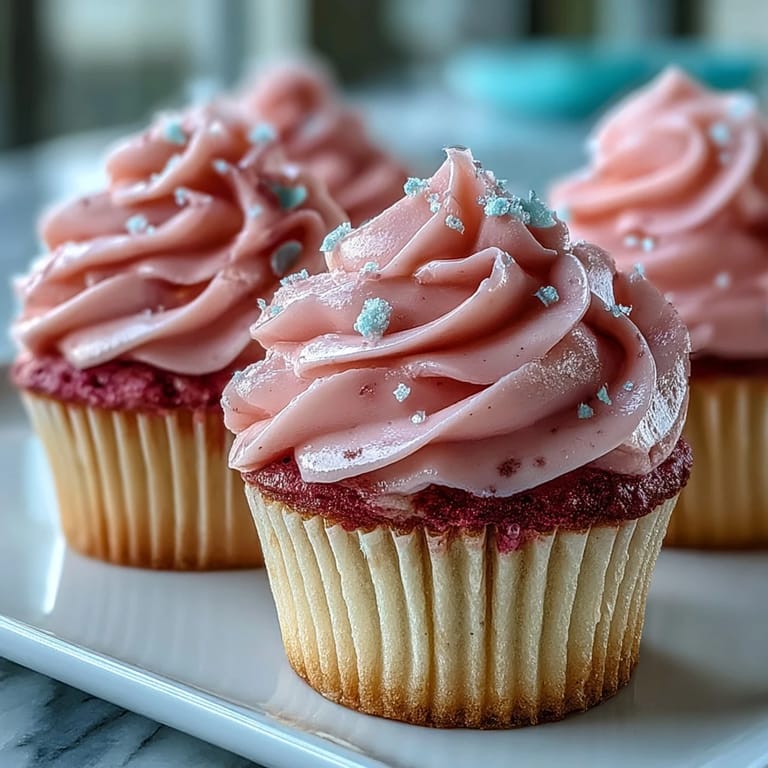
Save My cousin texted me a photo of a bakery window in Brooklyn, all blush and cream swirls, and I couldn't stop thinking about it. I'd never made pink velvet before, only red, and the idea of something softer, less dramatic, felt right for spring. The first batch came out pale as a whisper, so I tweaked the gel until the batter glowed like the inside of a seashell. When I pulled them from the oven, the kitchen smelled like vanilla and butter, and I knew I'd found something worth keeping.
I made these for my friend's baby shower, and she cried when she saw the table. Not because they were perfect, but because they were pink and homemade and exactly what she didn't know she needed. We ate them on her porch while her toddler smeared frosting on his cheeks, and she told me she wanted to remember that afternoon forever. I think about that every time I pipe a swirl.
Ingredients
- Cake flour: This is what makes the cupcakes so tender and light. If you only have all-purpose, the cornstarch trick works beautifully.
- Baking powder and baking soda: Together they create the perfect rise and a slightly tangy backdrop that balances the sweetness.
- Unsalted butter: Room temperature is key. Cold butter won't cream properly, and melted butter will flatten the texture.
- Granulated sugar: Creaming it with the butter traps air, which gives you that airy, delicate crumb.
- Egg: One large egg binds everything without weighing it down. Let it come to room temp so it blends smoothly.
- Buttermilk: The secret to moisture and tang. If you're out, mix milk with a splash of lemon juice and let it sit for five minutes.
- Vanilla extract: Pure vanilla is worth it here. The flavor shines through in both the cake and the frosting.
- White vinegar: It reacts with the baking soda for extra lift and a hint of brightness.
- Pink gel food coloring: Gel is more vibrant and won't thin your batter. Start with half a teaspoon and add more if you want a bolder blush.
- Powdered sugar: Sift it or you'll end up with lumps in your buttercream. I learned that the hard way.
- Heavy cream: Just a splash makes the frosting pipeable and silky. Milk works too, but cream gives it a richer feel.
Tired of Takeout? 🥡
Get 10 meals you can make faster than delivery arrives. Seriously.
One email. No spam. Unsubscribe anytime.
Instructions
- Get ready:
- Preheat your oven to 350°F and line your muffin tin with paper liners. This is also a good moment to set out your butter and egg so everything's the same temperature.
- Mix the dry ingredients:
- Sift the cake flour, baking powder, baking soda, and salt into a medium bowl, then whisk them together. Sifting makes a real difference in texture.
- Cream butter and sugar:
- Beat the butter on medium for about a minute until it's smooth, then add the sugar gradually. Keep beating for 2 to 3 minutes until the mixture looks pale and fluffy, like whipped clouds.
- Add the egg and vanilla:
- Lightly beat the egg in a small bowl, then pour it slowly into the butter mixture on low speed. Once it's fully mixed in, add the vanilla and blend until you can smell it.
- Alternate wet and dry:
- On low speed, add a third of the dry ingredients, then half the buttermilk, then another third of dry, the rest of the buttermilk, and finish with the last of the dry. Scrape the bowl between additions and stop mixing as soon as everything is just combined.
- Tint the batter:
- Stir the vinegar and pink gel coloring together in a small cup, then pour it into the batter on low speed. Mix until the color is even and soft.
- Fill and bake:
- Divide the batter evenly among the 12 liners, filling each about two-thirds full, then tap the pan on the counter to pop any air bubbles. Bake for 18 to 22 minutes, until a toothpick comes out clean or with just a few moist crumbs.
- Cool completely:
- Let the cupcakes rest in the pan for 5 minutes, then move them to a wire rack. They need to be completely cool before you frost them, or the buttercream will melt.
- Make the buttercream:
- Beat the butter on medium until creamy, about a minute. Gradually add 2 cups of powdered sugar on low, then turn it up to medium and beat until smooth, about 2 minutes.
- Finish the frosting:
- Add the vanilla, cream, and a pinch of salt, then beat on medium-high for 1 to 2 minutes until it's light and fluffy. Taste and adjust: more sugar if you want it stiffer, more cream if it's too thick.
- Frost and decorate:
- Transfer the buttercream to a piping bag or use an offset spatula to swirl it onto each cupcake. Finish with sprinkles, edible pearls, or pink sanding sugar if you like.
 Save
Save The first time I piped these, my hands shook a little because I wanted them to look professional. They didn't, but my neighbor took one bite and said it tasted like a celebration, and I realized that was enough. Now I make them for birthdays, bad days, and random Tuesdays when I need something beautiful and edible. They've become my go-to for showing up with something that says I care.
What Makes Them Different from Red Velvet
Pink velvet is gentler, less cocoa-forward, and relies on vanilla and buttermilk for flavor instead of chocolate undertones. The color is softer, almost pastel, which makes them feel more delicate and less dramatic. I like them better for spring and summer gatherings, when red velvet feels too heavy. The texture is nearly identical, that signature tender crumb, but the flavor is lighter and the frosting feels like the star.
How to Store and Serve
Frosted cupcakes can sit at cool room temperature in an airtight container for up to two days, but I've never had a batch last that long. If you need to make them ahead, bake and cool the cupcakes, then wrap them tightly and freeze for up to a month. Thaw them on the counter, then frost just before serving. The buttercream can be made a day ahead and kept in the fridge, just let it come to room temp and rewhip it before piping.
Ways to Make Them Your Own
You can fold in mini chocolate chips, swap the vanilla buttercream for cream cheese frosting, or add a teaspoon of almond extract for a subtle floral note. I've also made them with raspberry puree swirled into the batter, which turns them into something entirely different and deeply pink. For a natural blush, beet powder works, though the color is earthier and the flavor slightly vegetal.
- Try lemon zest in the batter and lemon buttercream for a bright, springy twist.
- Top with fresh raspberries or edible flowers for a bakery-worthy finish.
- Make them mini and bake for just 10 to 12 minutes for bite-sized treats.
 Save
Save These cupcakes have become my love language, the thing I make when words feel too small. I hope they bring you the same kind of quiet joy they've brought me, one soft pink swirl at a time.
Common Questions
- → What makes pink velvet different from red velvet?
Pink velvet omits the cocoa powder typically found in red velvet, resulting in a lighter, more delicate vanilla-forward flavor profile while maintaining the same tender crumb structure and tangy sweetness balance.
- → Can I make these cupcakes ahead of time?
Bake the cupcakes up to 24 hours in advance and store unfrosted in an airtight container. Frost shortly before serving for the freshest texture and appearance.
- → What's the best way to achieve consistent pink coloring?
Use gel food coloring rather than liquid for vibrant, predictable results. Start with a small amount and gradually add more—remember the color deepens slightly after baking.
- → Can I substitute natural ingredients for food coloring?
Beet powder works wonderfully for natural pink tint. Freeze-dried strawberry powder also adds subtle flavor along with color. Both alternatives produce softer, more muted hues than gel coloring.
- → Why is room-temperature ingredients important?
Cold ingredients don't emulsify properly, leading to dense textures or curdled batter. Room-temperature butter, eggs, and buttermilk incorporate smoothly, creating the signature airy velvet crumb.
- → How do I know when the cupcakes are done baking?
Insert a toothpick into the center—it should come out with just a few moist crumbs rather than wet batter. The tops should spring back lightly when touched and edges should just begin pulling from the pan.