 Save
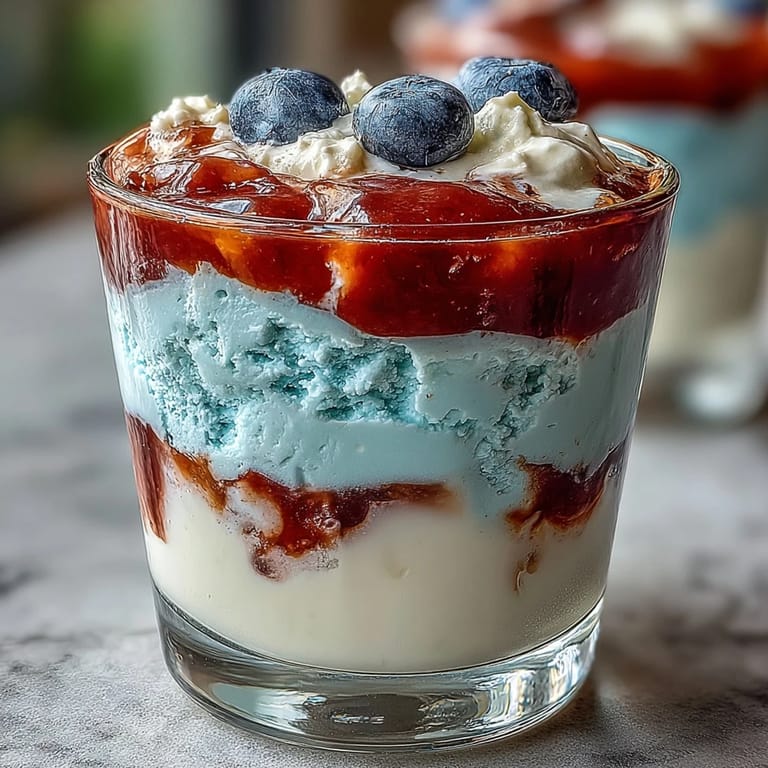
Save My daughter came home from school one July afternoon buzzing about red, white, and blue everything for a neighborhood block party. She wanted to bring something that looked as patriotic as it tasted, and I found myself staring at a box of strawberry Jello, thinking there had to be a way to make something visually stunning. That's when the idea struck—layered cups with perfectly striped colors, each one like a tiny edible flag. What started as a casual afternoon project became the dessert everyone kept asking for.
I remember the look on my neighbor's face when she saw those cups lined up on the dessert table, catching the sunlight through their translucent layers. She asked if I'd made them at a fancy bakery, and I couldn't help but laugh—they're honestly so simple that once you understand the rhythm of setting and pouring, you could make them with your eyes closed. Well, almost.
Ingredients
- Red Jello (strawberry or cherry): The foundation of your patriotic tower, and the flavor sets the tone for the whole experience—don't skip tasting it as you mix to make sure the color appeals to you.
- Boiling water: Activate the gelatin completely by using water that's truly hot; lukewarm water leaves grainy, cloudy layers.
- Cold water: Cools the mixture to the right temperature without adding ice that might cloud the final texture.
- Unflavored gelatin: The secret to that creamy white layer—it's firmer and more luxurious than milk alone.
- Sweetened condensed milk: Creates the opaque white stripe that makes the color contrast pop, and its sweetness balances any tartness from the berries.
- Blue Jello (blue raspberry): The final crown jewel—choose a brand with good color depth, as some versions look pale and washed out.
- Whipped cream and fresh berries (optional): These elevate the cups from festive to truly special, adding texture and freshness on top.
Tired of Takeout? 🥡
Get 10 meals you can make faster than delivery arrives. Seriously.
One email. No spam. Unsubscribe anytime.
Instructions
- Set up your workspace:
- Grab eight clear cups and arrange them where they won't get jostled around—I use a muffin tin to hold them steady and tilted at an angle for that first layer. This prevents spills and keeps your workspace organized for the layering marathon ahead.
- Mix the red layer:
- Dissolve the red Jello in one cup of boiling water, watching it turn from granules to liquid velvet, then stir in the cold water to cool it slightly. Pour about two tablespoons into each cup and refrigerate them tilted at an angle in the muffin tin for 45 to 60 minutes until the surface feels set when you gently press it.
- Prepare the white layer:
- Sprinkle the unflavored gelatin over cold water and let it sit for five minutes—this blooming step is crucial, as it helps the gelatin dissolve smoothly without lumps. Add boiling water and stir until completely clear, then stir in the sweetened condensed milk and let it cool to room temperature, which takes about 10 to 15 minutes.
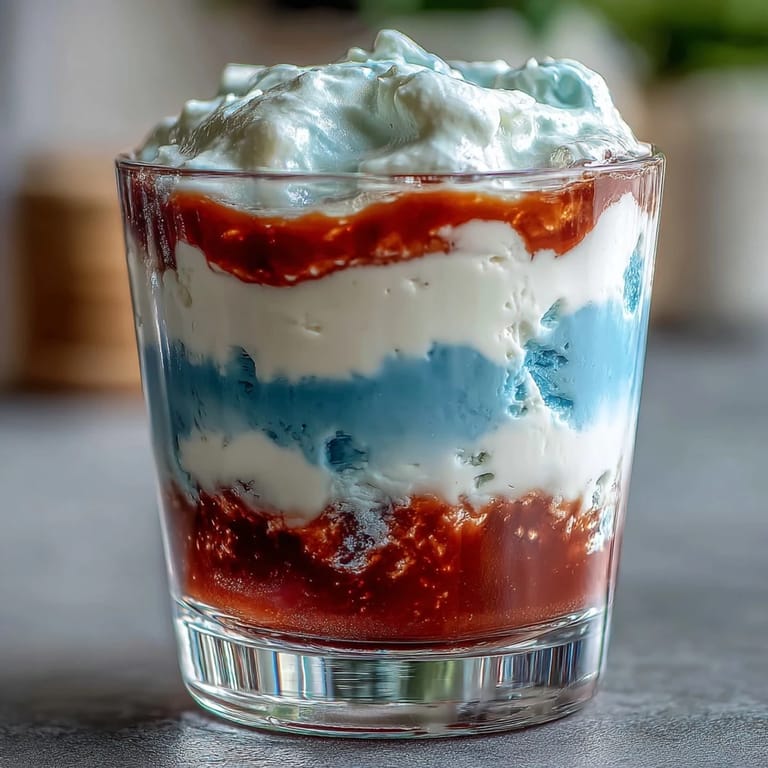
- Layer the white:
- Once the red layer is firm to the touch, stand the cups upright and slowly pour the cooled white mixture on top, aiming for about two tablespoons per cup. Place them back in the refrigerator upright for another 45 to 60 minutes; resist the urge to rush this step, as the layers need time to set properly.
- Mix the blue layer:
- Dissolve the blue Jello in one cup of boiling water, then add the cold water and let it cool to room temperature before the final pour. The cooling step prevents the heat from disturbing the white layer underneath.
- Complete the layers:
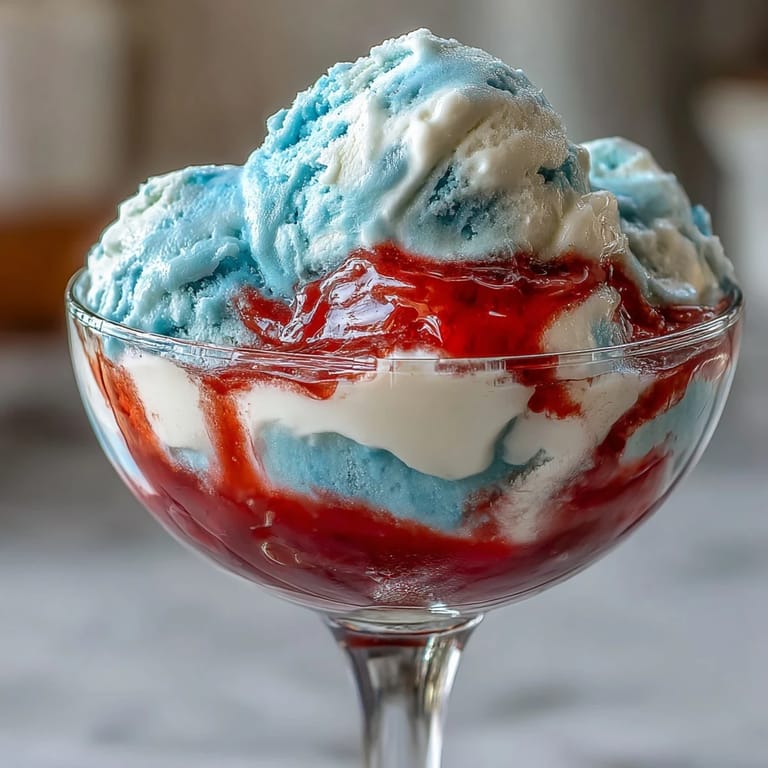
- Pour the cooled blue Jello gently over each white layer, using about two tablespoons per cup, and refrigerate upright for at least two hours or overnight. The longer they chill, the more distinct and firm your layers will be.
- Serve with flair:
- Before serving, top each cup with a dollop of whipped cream and a scatter of fresh blueberries and strawberries for maximum visual impact. The colors will pop even more against the cream.
 Save
Save One summer evening, I made these cups for a dinner party, and my mother-in-law actually stopped mid-conversation to ask if I'd made them from scratch. When I told her yes, she asked for the recipe immediately, which felt like the ultimate compliment. These little cups became more than just a dessert that night—they became a conversation starter and a small moment of pride in my kitchen.
The Science of Perfect Layers
There's something satisfying about understanding why these cups work so well. The Jello sets firmly because of gelatin's protein structure, which creates a gel network when cooled. The white layer uses unflavored gelatin plus condensed milk, which makes it denser and more opaque than the colored layers—this difference in opacity is what gives you those beautiful contrasts you see when light shines through. I learned this lesson the hard way when I once tried to make all three layers from Jello, and the result looked muddy and blended rather than crisp and striped.
Making Them Ahead for Parties
The beauty of these cups is that they actually taste better the day after they're made—the flavors meld slightly and the texture becomes smoother. I often prepare them the night before a party, which takes all the pressure off morning-of cooking. Just cover them loosely with plastic wrap in the refrigerator, and they'll keep perfectly for up to three days, though the colored layers may fade slightly after that.
Creative Variations and Flavor Swaps
After making these the traditional way a dozen times, I started experimenting with different flavor combinations. One winter I tried lime and lemon for a citrus twist, another time I did orange and cherry for a sunset effect. The white layer remains constant, but the flavors you choose are completely flexible based on the season or your mood. This is where these cups move from being just a recipe to becoming your own edible art project.
- Try tropical flavors like mango and pineapple Jello for a summer beach party vibe.
- Swap the sweetened condensed milk for coconut milk if dairy isn't an option—the flavor becomes lighter and more delicate.
- Add a small splash of vanilla extract to the white layer for subtle depth and sophistication.
 Save
Save These layered cups remind me that some of the most impressive dishes come from the simplest ingredients and the most patient hands. They're pure joy served in a cup.
Common Questions
- → How do I achieve sharp, defined layers?
Allow each gelatin layer to fully set before carefully pouring the next one to maintain clean, distinct stripes.
- → Can the flavors be substituted?
Yes, berry flavors like cherry or strawberry for red and blue raspberry for blue can be swapped to suit your taste preferences.
- → What is the purpose of chilling at an angle?
Chilling the cups at a slight angle helps create angled layers, adding a fun and attractive presentation to the dessert.
- → Is there a dairy-free alternative for the white layer?
Yes, you can replace sweetened condensed milk with coconut milk and sugar to make a dairy-free version.
- → How long should the final layer be chilled?
The blue layer should be refrigerated upright for at least 2 hours to ensure it fully sets before serving.