 Save
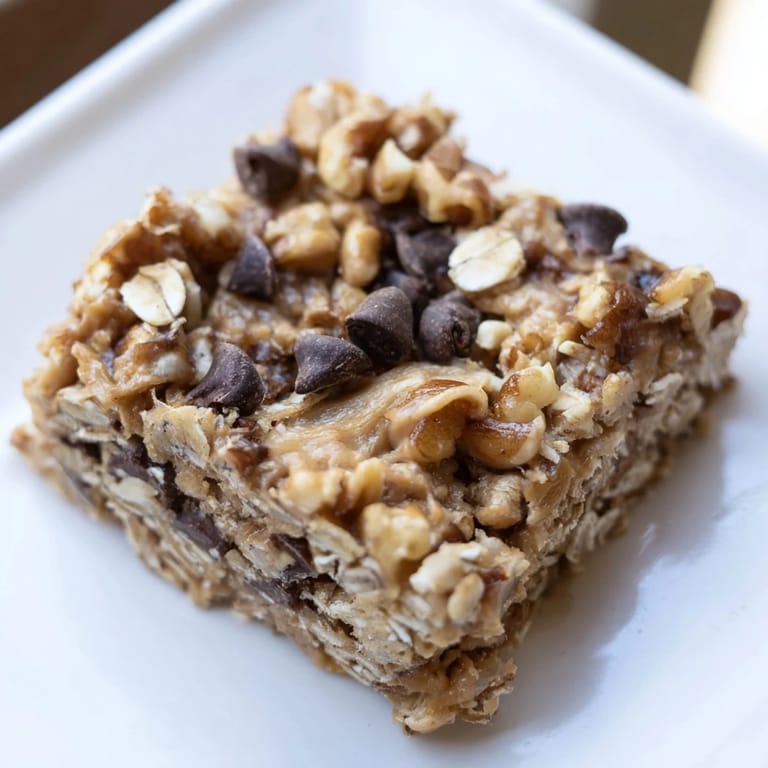
Save My kitchen smelled like banana bread one Tuesday afternoon when I realized I'd bought too many bananas again—the kind of small failure that happens to everyone. Rather than let them go brown in the fruit bowl, I grabbed a jar of peanut butter and some oats, thinking I could create something faster than actually baking. What emerged was this no-fuss bar that tastes indulgent but requires nothing more than a spoon and a cold refrigerator. These bars have become my go-to when I need an honest snack that doesn't pretend to be a dessert.
I brought these to a hiking trip last summer, wrapped in foil like little gifts, and watched my friends devour them between switchbacks without realizing there were oats inside. That moment—when someone says "wait, these are actually good for me?"—is when you know you've won at snack-making.
Ingredients
- Ripe bananas: The mustard-yellow ones with brown spots are what you want—they mash smoother and taste sweeter than firm ones.
- Creamy peanut butter: The kind that stirs easily, not natural almond butter that separates; this is about texture, not virtue signaling.
- Honey or maple syrup: Either works, but maple adds an earthy depth that honey doesn't quite match.
- Vanilla extract: A small pour that somehow makes everything taste less like "healthy" and more like actual food.
- Old-fashioned rolled oats: Not instant oats—they hold their shape and give the bars backbone.
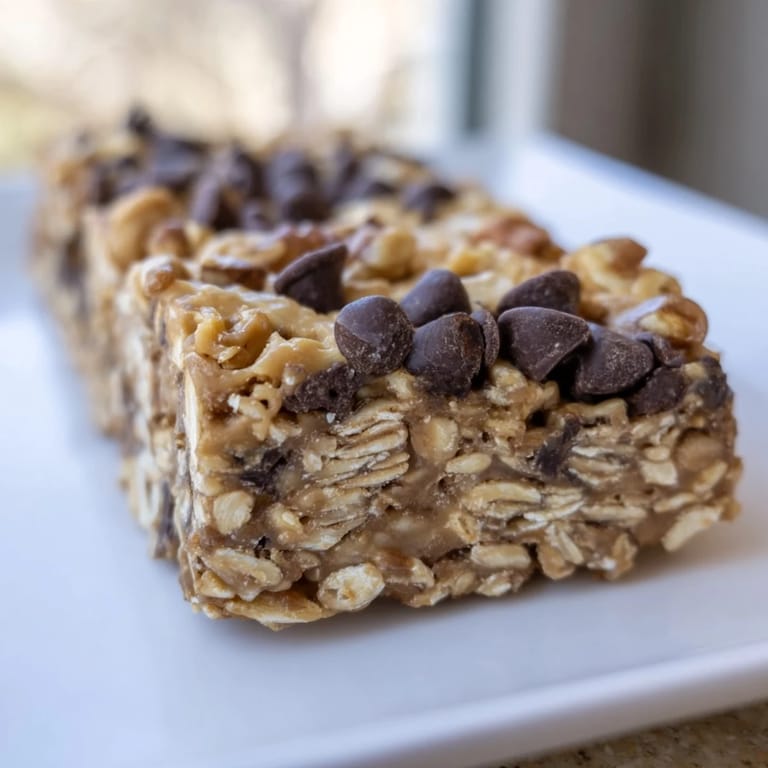
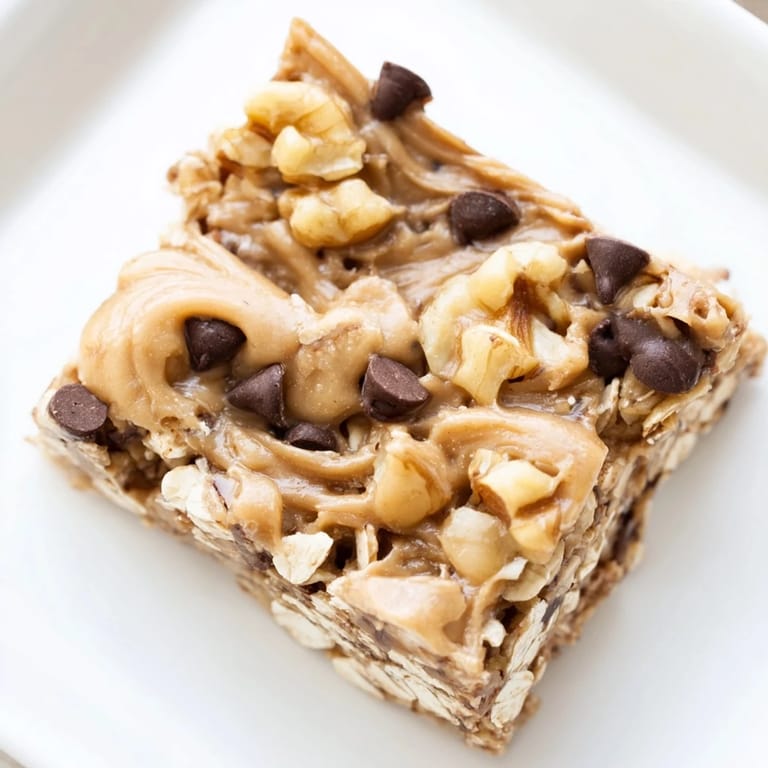
- Walnuts or pecans: Optional but worth it if you like that subtle crunch that appears halfway through chewing.
- Mini chocolate chips: Optional, though I've never made these without adding at least a handful.
- Salt and cinnamon: Tiny amounts that somehow make the whole thing taste more refined.
Tired of Takeout? 🥡
Get 10 meals you can make faster than delivery arrives. Seriously.
One email. No spam. Unsubscribe anytime.
Instructions
- Prepare your stage:
- Line that 8x8 pan with parchment paper and let the edges hang over like curtains—this is your safety net for getting everything out without crumbling.
- Mash the bananas:
- Push them against the bowl with the back of a fork until you have mostly smooth pulp with maybe a few small lumps. Aim for the texture of chunky applesauce.
- Marry the wet ingredients:
- Stir the peanut butter, honey, and vanilla into your mashed bananas until the whole thing looks uniform and creamy. This takes about a minute of steady stirring.
- Fold in the dry goods:
- Add oats, salt, cinnamon, and anything else you're using, then stir until every oat is coated and the mixture feels cohesive. You're looking for something that holds together when pressed.
- Press and pack:
- Spread the mixture into your prepared pan and use the back of a spatula or spoon to press it down firmly and evenly. The more compressed it is, the cleaner your cuts will be later.
- Chill and set:
- Refrigerate for at least an hour until the whole thing feels solid and firm, not squishy. Overnight is even better if you have the time.
- Slice and store:
- Use the parchment overhang to lift the whole block out, then cut it into 12 bars with a sharp knife. Store them in an airtight container in the fridge where they'll keep for a week, though they rarely last that long.
 Save
Save My eight-year-old cousin asked for thirds of these at a family lunch, and when I told her she'd just eaten healthy oats, she looked genuinely betrayed. That's the moment I realized these bars had transcended "virtue snack" territory and become something she actually wanted, not something she was forced to eat.
Why These Bars Work Without Baking
There's a common belief that real food requires an oven, but these bars prove that texture and satisfaction can come from patient pressing and cold time instead. The oats absorb moisture from the banana and peanut butter, becoming tender and chewy in the refrigerator without any heat. It's less chemistry, more patience—and honestly, that's a lesson worth remembering beyond just snacks.
Customizing Your Bars
The foundation here is flexible enough to let you riff without breaking anything. I've made versions with almond butter for a lighter taste, swapped in dried cranberries instead of chocolate, and once even added a tablespoon of instant coffee powder to echo the chocolate. The point isn't to follow me exactly; it's to understand that as long as your wet and dry ratios stay roughly balanced, you can make these yours.
Storage and Portability
These bars are built for real life, not just for sitting pretty in a recipe photo. They travel in backpacks, car cups, and lunch boxes without falling apart, and they don't need to be kept cold while you're out—just pop them in the fridge overnight and wrap them individually for grab-and-go convenience. I've found that wrapping them in small pieces of parchment or even wax paper keeps them from sticking to each other while also making them feel less like leftovers and more like intentional snacks.
- Wrap individual bars in parchment paper for packed lunches that look a bit more thoughtful than just tossing them in a container.
- Keep them in the fridge and they'll stay fresh for a full week, though honestly, they're so good you'll eat them faster.
- If you want to bring them somewhere warm, pack them in a small insulated lunch bag rather than leaving them at room temperature where they'll soften.
 Save
Save These bars remind me that some of the best things in a kitchen happen when you stop overthinking and just work with what tastes good and feels right. Make them once, then make them your own.
Common Questions
- → Can I substitute peanut butter?
Yes, almond or sunflower seed butter works well as a substitute for a different flavor or to accommodate allergies.
- → How long should the bars chill?
Refrigerate the mixture for at least 1 hour until firm enough to cut into bars.
- → Are the bars suitable for vegans?
Use maple syrup and dairy-free chocolate chips to make these bars vegan-friendly.
- → Can I add nuts or chocolate chips?
Optional walnuts, pecans, or mini chocolate chips can be mixed in for extra texture and flavor.
- → How should these bars be stored?
Store bars in an airtight container in the fridge for up to one week to maintain freshness.